Page 5 of 7
Re: Short Stirling Sanger 1:48 scale Kit - Build
Posted: Sun Jan 15, 2012 11:52 am
by K4KittyCrew
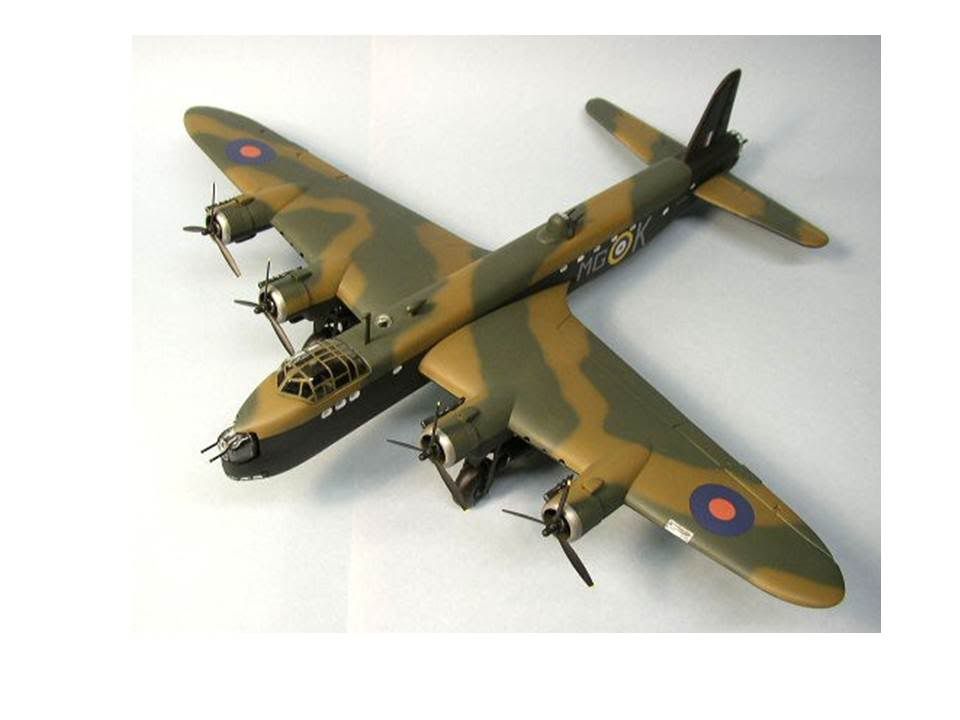
Many thanks Dave, I have been using this pic for much detail whilst building and looking at the front of the cowlings, with the 'copper' type colouring, it made me question it because I've seen other pics and seen silver colouring ............ and wasn't quite sure which way to go, so I just wanted to ask you guys your thoughts.
Cheers,
John
( Note - I've lost track of which site I found this model, so if anyone comes across it, please let me know and I will post the credits.)
Re: Short Stirling Sanger 1:48 scale Kit - Build
Posted: Sun Jan 15, 2012 5:42 pm
by PAFG
I love that photo Dave - gets me every time!
Immense patience being shown at every step of the way John. This seems to be a model to fight, not enjoy, but she's looking good all the same

Hang in there!
Richard
Re: Short Stirling Sanger 1:48 scale Kit - Build
Posted: Mon Jan 16, 2012 8:33 am
by K4KittyCrew
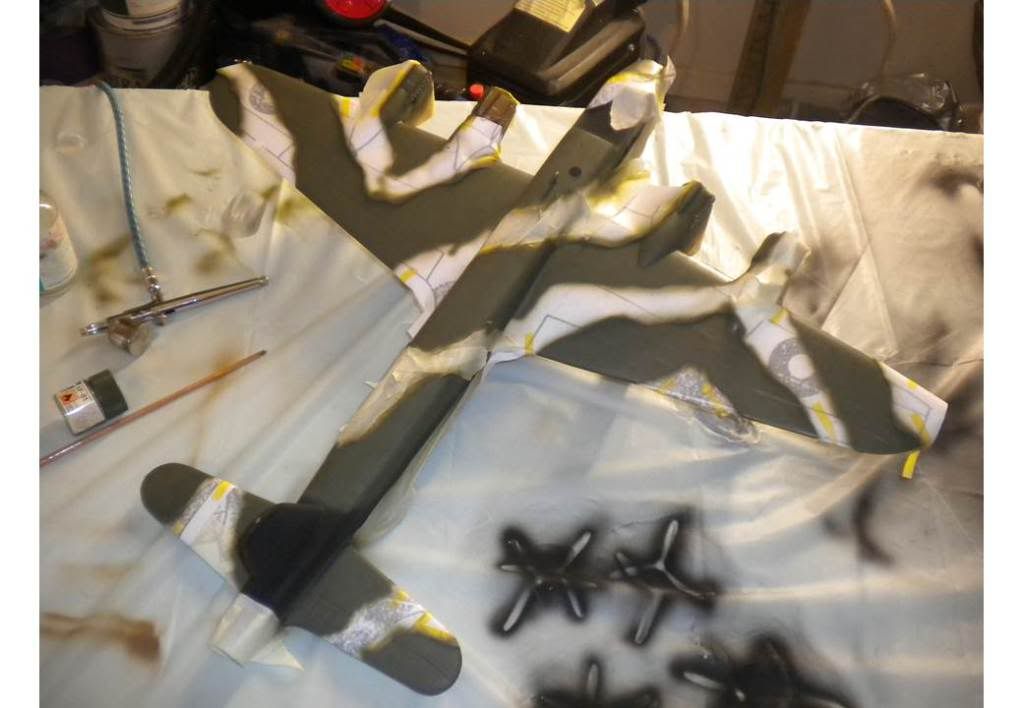
OK, back to the spray booth for a bit of colour ............... the brown is underneath the stencils that I enlarged to fit the 'kit'. Now, it will go back to the paint shop for a 'final' on the black.
John
Re: Short Stirling Sanger 1:48 scale Kit - Build
Posted: Mon Jan 16, 2012 1:55 pm
by paul61
Hi John,
Fine looking model!
Just a thought re. the colour of the area you mention.
Since this area of the cowl is the Herc's exhaust manifold collector, the silver or copper colouring may have been high heat paint in the early days?
The actual flat sheet metal cowl is between this manifold and the cooling flaps.
Cheers.
Paul
Re: Short Stirling Sanger 1:48 scale Kit - Build
Posted: Wed Jan 18, 2012 3:23 pm
by ME453
John, to say that I'm MEGA-IMPRESSED would be an understatement!!!! I've started one of Mr Sanger's models, an Oxford, so I'm aware of how they come and just how much work is involved in creating a worthwhile model. The Sanger kits are light years away from your standard "bolt together" versions that most of us make, and this only adds to my admiration of the fantastic job that you've made of a model that I know has a very poor reputation AND has defeated many experienced modellers in the past. They, perhaps, haven't used your innovative approach to solving the problems inherent in this vacu-form kit but then you are looking at the difficulties with a mind uncluttered by conventional modelling techniques and brought some of your builder's experience to bear! Well done that man, I can't wait to see it finished! (though I'll be damned jealous!!)

Max
Re: Short Stirling Sanger 1:48 scale Kit - Build
Posted: Thu Jan 19, 2012 11:03 am
by K4KittyCrew
Many thanks Paul and Max for your kind words and advice. I haven't be able to spend as much time on it this week, however, with the weekend just around the corner, I will try to complete the paint work.
Cheers,
John
Re: Short Stirling Sanger 1:48 scale Kit - Build
Posted: Sun Jan 29, 2012 7:36 am
by K4KittyCrew
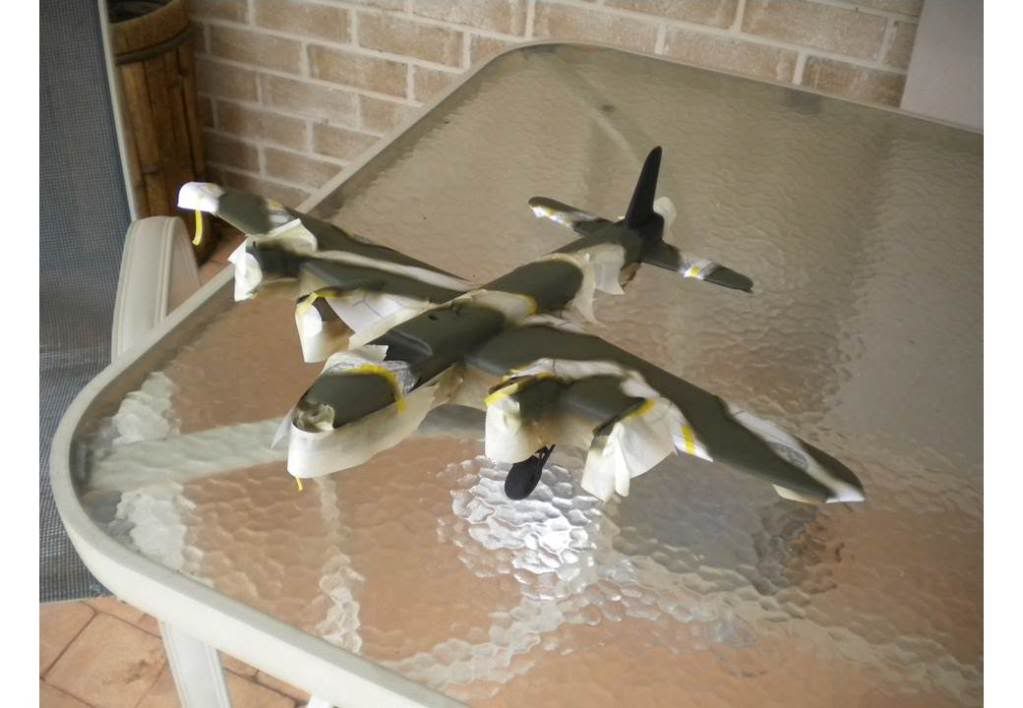
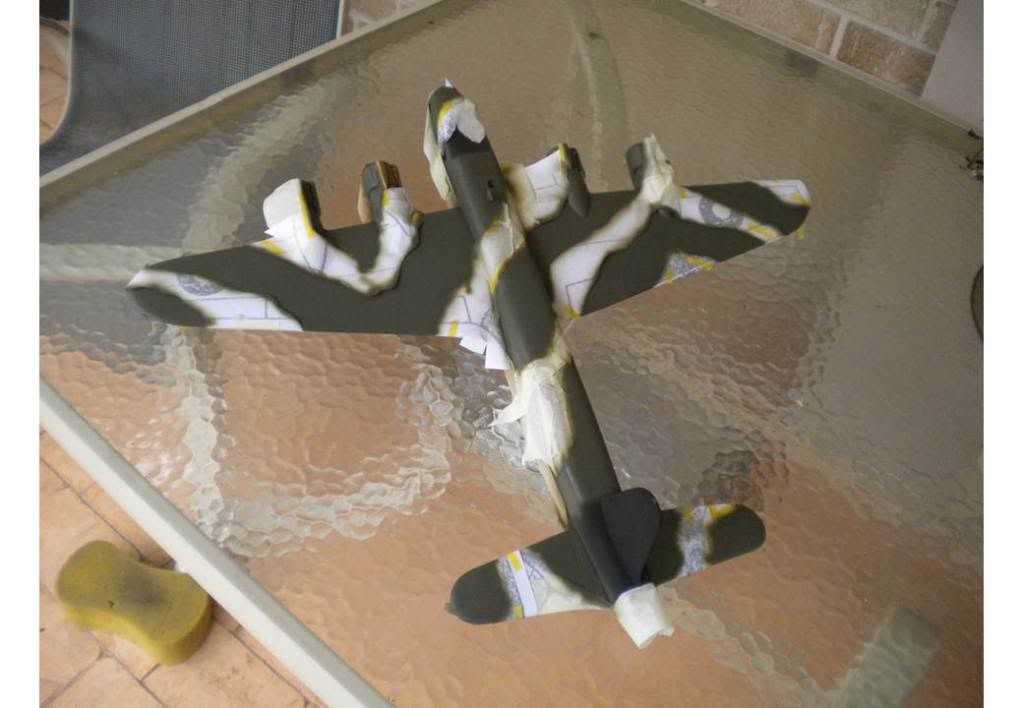
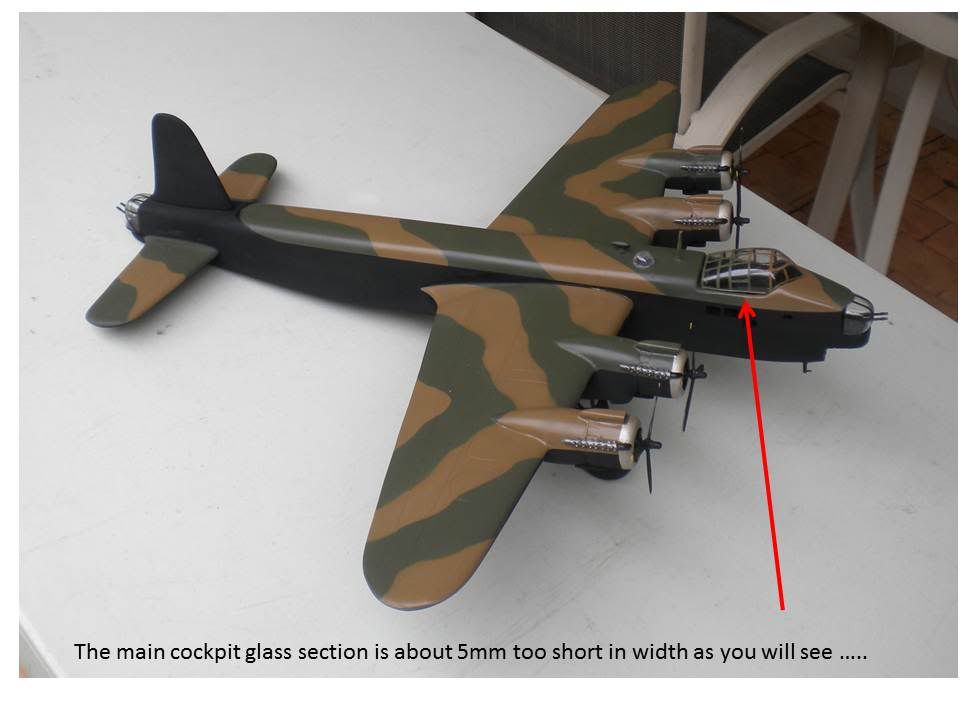
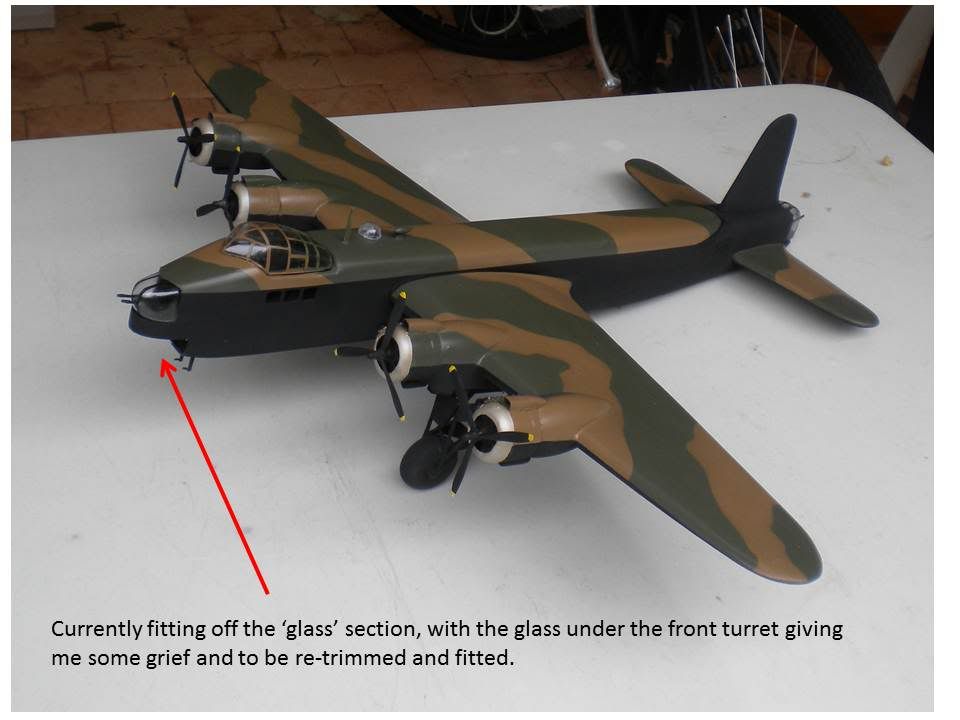
Well, here are some more photos, taken today on a wet and overcast day on the Gold Coast. ( been raining now for about 3 weeks ) I've nearly completed the build and attempted to fit the 'decals' onto the wings and rear tailplane, when I struck a major problem ( have fitted many over the years but never experienced such a problem ) .......... Once they have been submerged in water, when you remove the decal from the white backing, there is NO white on the decal ........... what's more, they are transparent, not solid.!!!! So when I fitted the decal to the rear tailplane, there was no white centre!!!!!
You could barely see the red and blue against the black background.
I normally refrain from venting my frustrations but this is a joke. Now, I'll have to see if I can locate some locally ( decent decals, that is! )
Anyway, here are some photos.
Cheers,
John

Re: Short Stirling Sanger 1:48 scale Kit - Build
Posted: Mon Jan 30, 2012 9:00 am
by Stirling Project
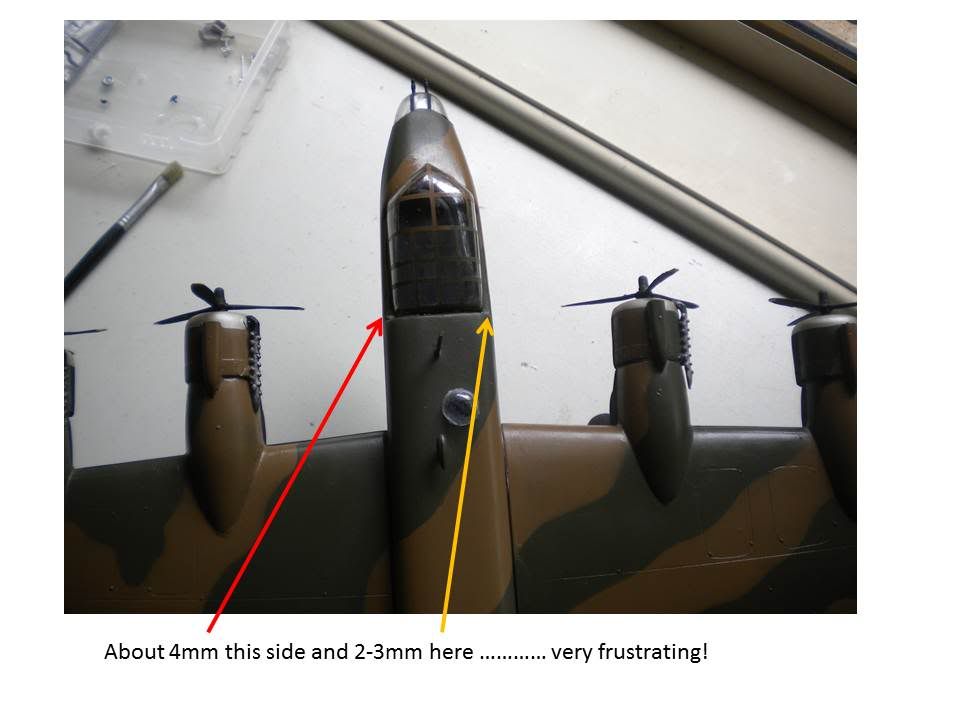
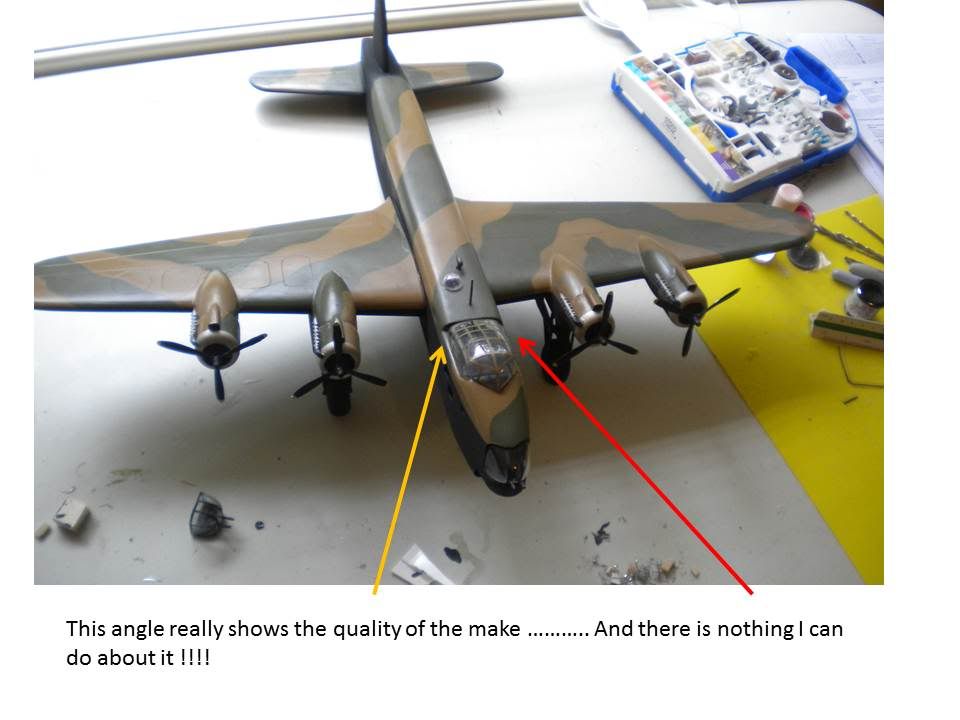
Hi John
The side profile of the coupe looks ok, so an idea would be to fill the canopy with filler, let it set, then split the resulting former until you get the correct width. You can then use this to plunge mould a new canopy.
JL
Re: Short Stirling Sanger 1:48 scale Kit - Build
Posted: Wed Feb 01, 2012 11:13 am
by ME453
That's a damned shame about the canopy John. I can't see any way around it other than making your own, and that can be frustrating to try as well! She looks fantastic, too good to even think of not completing now!
Regards
Max
Re: Short Stirling Sanger 1:48 scale Kit - Build
Posted: Wed Feb 01, 2012 7:12 pm
by GuyMassey
It's definitely worth having a go at blowing your own, there are lots of home made vacuform instructions on line. Basically a smallish biscuit tin with small holes drilled in a 1cm grid on the lid (mask off any you don't use), a vacuum cleaner hose inserted in the side and sealed with Duct Tape. Place the former on the lid and with the vacuum cleaner switched on, soften a sheet of clear plastic on top of it using a heat gun. You'll get through a lot of old CD cases and will have to experiment a bit, but once you've done it once it gets easier! Honest!!! (Try lining the existing canopy with cling film and filling it with Milliput. Over fill it so that you will have some waste to cut off when you blow the new canopy.
Good luck mate, don't get down-hearted she is looking amazing so far. PS if you have trouble getting new decals down under I'll give you a UK contact that will help.
Regards
Guy